HND 2 BLOG
Rhys Watts
Evaluations
Evaluation and Reflection:
Please find below three sets of evaluation questions to consider at the end of your project and write up in your blog.
You should also check on these throughout the process of your project as this will help you to develop ideas and problem-solve issues before it is too late (ie: the end of the project!)
1) Visual Communication:
In what ways does the visual communication/message of the piece meet the needs of the brief?
For the FMP we had to create our own proposal of what we would like our brief to be. I wanted to create magazine spreads with a specific interest in quality automotive photography inside, as well as an application and store. I feel I have achieved all of these things, especially from the use of post production editing in my photos to achieve a desired feel.
In what ways does the visual communication/message of the piece fail to meet the needs of the brief?
I dont believe I failed in any way to meet the brief as I had a good idea from the beginning of the pieces I would like to create. I have also managed to produce all of my items that I stated in my proposal.
What are the strengths of the visual communication? Why?
My strengths are in my photography and page layout. I spent a lot of time post production editing my work inside photoshop and lightroom and indesign. I feel post production of photos is very important and spending time achieving desired looks and consistency helps create a professional mode of working and the finished items look a higher quality.
What are the weaknesses of the visual communication? Why?
The weaknesses I feel sit within my app. However I dont see this as a bad thing as it is one of my first attempts creating an application inside Indesign using digital publishing tool set. I’m proud of what I have created an the amount of interactivity I have made inside it, I would like to try more of this on software designed specifically for mobile app design.
In what ways could the piece be mis-read or mis-understood by the audience? Be specific about who the audience is.
I don’t see how people could mis-understand my work. The audience would be mainly men targeted between 16-30. Both my zines feature front covers with an exterior or interior car shot, making it quite obvious what contents lay within. They could possibly not realise that it is specifically about modified automotive zine from the interior picture but this would be a very slim chance.
In what practical ways could the piece be developed or improved?
A lot more time invested into the app design. Looking into paper types to use, recyclable, double sided photo paper, perhaps a greater insight to zine packs that dont use plastic bags, as this could be an environmental issue if mass produced to a large audience.
2) Good Design? Evaluation
Please note you are asked to describe and make analysis of your thoughts and actions about the topics below. If you have been able to act upon your considerations of Good Design you should give reasons for your design decisions. If you have not been able to act upon your considerations, nevertheless give reasons for this and reflect upon your thoughts about the actions you would have liked to have taken further. Honest evaluations are required as this reflection is to help you move forward.
In what other ways have you considered the sustainability of your project process and outcomes?
I looked into paper types that are recyclable and from sustainable sources. Also I have looked at zine packs made from paper/card instead of plastic, however I found these would not be as suitable in the areas they would be handed out (eg. shows and events outside in rain)
In what ways have you considered the ethical implications of your project process and outcomes?
I haven’t had to think about ethical implications too much in this project, mainly as I am not uses any photos of people or writing any information about anyone. Cars are a subject that cant really create any ethical impactions.
In sustainability and ethical terms in what ways was your work in this project an improvement or a backward step for you as a socially conscious designer?
This project has been an improvement as a socially conscious as it has been another successful project in respect to looking into sustainability and ethical issues. It is another project that has made me think of these issues only adding to my knowledge of this subject.
What targets can you make at this point for your work in the future as a socially conscious designer?
Keep on going, carrying out the same thought processes and recognising what being a socially conscious designer is.
3) Reflection of own working practices:
Be very honest with yourself in this section. Please feel free to approach a member of staff for help finding ways to develop skills.
How was my time keeping?
This project started around the same time the charity branding project was released. I spent a lot more time on that at the beginning due to the deadline being a lot sooner. However I feel I managed to balance both and work on both together keeping my time well.
How was my analysis of the brief?
This project was a little different as I had my own proposal/brief to follow however I have analysed what I wanted to achieve and produced them in my finals.
How was my research?
I have previously done a lot of research into page layout and photographers so I only done small amounts on this project to refresh myself. I struggled finding applications to research that had a similar story to mine, however it was useful to look at existing social media giants like Facebook and instagram.
How did I draw conclusions from my research?
Page layouts that work and could still be effective when scaled down to my zine size definitely stemmed from my research, as well as the idea to create zine packs as a promotional item.
How did I use evaluations to help with my ideas generation and development?
By evaluating my work as I went through helped me take a step back and see what was working and what wasnt. Having a meeting with light maker also helped me evaluate my work from another designers perspective which was really helpful.
How did I use experimentation during the project? How can I make this more effective?
I experimented with digital publishing in this project which I wasnt too confident in. To make this more effective I could of researched into software designed for app production.
What parts of the project did I enjoy most? Why was this the case?
Creating my zine was really interesting as I could see myself using these as a real piece of ephemera to use as promotion for my car page. creating a net and cutting to create a foldable zine was also enjoyable.
What parts of the project did I enjoy least? Why was this the case?
The app design, mainly because I struggled a lot in the beginning using the software.
At what times did I work best? Why might this be the case? How can I ensure that I work well at al times?
I worked best at home whilst in a quiet envrionment. I feel this helps me concentrate on my work and I can be experimental in my work and not feel people can judge my experimentation when I am designing.
What areas inspired me? Why was this the case? How could I follow these up?
The zines inspired me the most. I would like to produce more of these as they are simple and interactive for the audience to quickly pick up, flick through and get a feel for a certain event.
What areas were challenging or difficult? Why was this the case?
As said before the app was the most challenging purely from my lack of experience in this field. More practice and research will help me in the future
Do I need to develop certain skills? Do I need these now? Or later?
Designing mobile app will be a skill i’d love to develop further however this is not critical at the stage I am at and can be a skill for me to learn later.
Any other points?
A throughly enjoyable project that allows you to develop and spend time on something that you love, and would like to progress into as a career pathway.
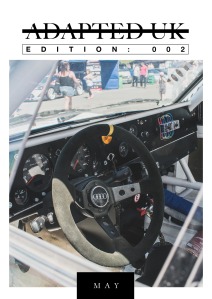
Final Zine – Edition 2
Here are all the digital copy of my zine spreads from the second edition of the zine I designed.


Finished App
Below is a slide show of my finished app pages. This has all been designed inside digital publishing so all buttons work as navigation. I will screen cast this at the show and my crit presentation so I can show my work in using interactivity. This was a challenging task to take on whilst also researching and creating my zines but I am proud of what I have produced, and gives me an idea of how I could follow this through and develop an app for my automotive page.
App Revisit
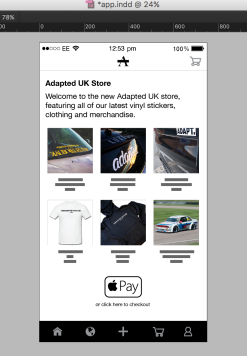 After speaking with Lightmaker about my app in the portfolio session I have decided to change a few elements of how the app navigates. The main point is the navigation bar at the bottom of the app. I now have a specific place for my store instead of a a button on the explore page.
I have also changed elements inside the explore page map, I had included a zoom icon on the map which we discussed wasnt needed as nearly everybody knows how they would navigate to zoom in on a map on a touch screen device. It really helped me exporting my app as jpegs to my own phone to see how they work on a touch screen device and to make sure everything felt natural to use.
App Mock Ups
I have downloaded iPhone mock ups from Mockupworld, these are free mockups to use with your own designs inside. These are iPhone 7 size so my designs fitted straight inside. I will use these as advertisements on the back of my zine to showcase the Adapted UK app now being available. I have cut out the background on the first one and added my own image of a car with a gaussian blur on, to reinforce where the app has started from and how you can share images straight away. The second I kept a pair of shoes behind to show the app is mobile, you can look and read about events all over the world wherever you are.


Vinyl Stickers for Zine Packs
In my zine packs I have said before about including promotional items inside with the zine. Stickers are a big part of the automotive community with people using stickers on their cars to showcase what group they are with or what parts they use on their cars.
I have used vinyl and a plotter to cut out some Adapted UK stickers to go in my zine packs. This is my process:
Firstly was setting up the plotter. I have this at home as I make large stickers for the car page already. Using an app called Silhouette Studio I can layout my vector outlines of my stickers so the software knows where to cut. I measured the size of my zine pack to make sure they would fit inside. After the plotter is finished cutting you need to start a process called weeding. This is removing all of the excess backing vinyl so only the sticker is left. This is quite a time consuming process with multiple stickers, as there is lots of counters inside the text to remove.

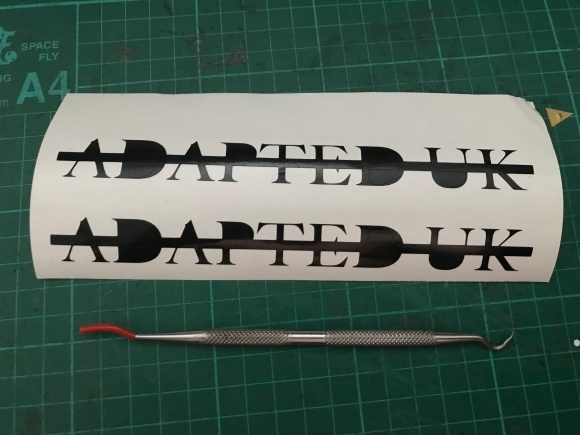
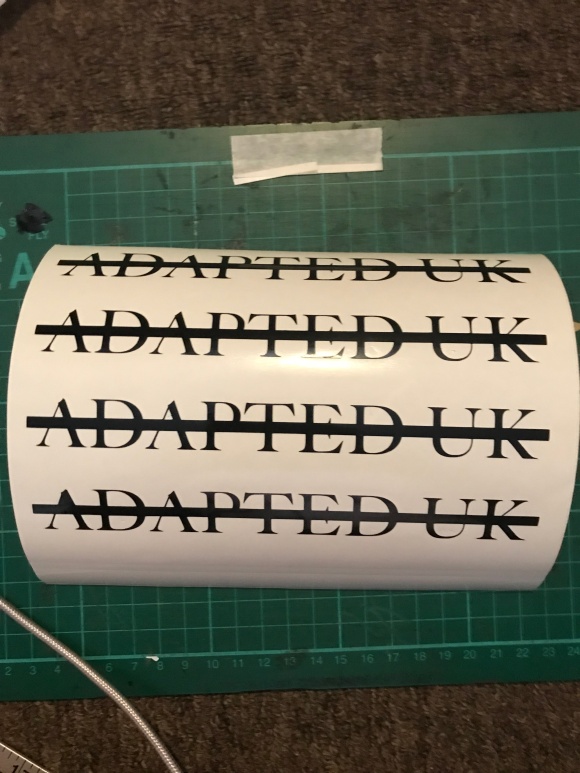

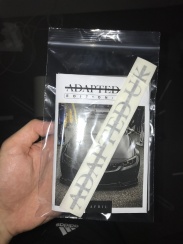
After it is weeded transfer paper needs to be added. This is like a large piece of masking tape that allows the user to lift the vinyl of the backing paper revealing its adhesive back allowing it to be transferred on to lots of different surfaces. These stickers will fit into my zine back as shown (left).
I will like to try and cut some more stickers to add inside the zine.
App Development
After sketching some initial ideas for my app I opened up indesign and started to design my app layout. Firstly I concentrated on my splash screen and sign in page. The smash screen features the Adapted UK logo in white contacting on a black background, this would initially load up when the app is clicked on and last a matter of seconds before the app loads. The sign up page is something I wanted to design to create realism for people when the see the app. I concentrated a lot on the layout of the app, on the typography used, changing weights of type in the title and subtitle.


The next steps after I had achieved the look I was after was to start experimenting with the digital publishing aspect of Indesign. I have used this a couple of times before in previous years studying graphics, however it took me a while to understand all the menus again. On the left you can see the buttons and forms menu, this allows me to create actions for specific text, shapes and images boxes. On this screenshot I am creating an action for the log in button, this is set up to ‘Go To Page’ and will replicate how signing in would work on a real app. I have also created a roll over effect, this means when hovered over (on computer) it will change colour or when tapped (mobile device).
Professional Practice (25/05):
After showing Lightmaker my app design I was advised to export an image of my app to my mobile device to see how the elements feel when scaled down onto a real phone, and if the buttons are accessible when the phone is being held. This helped me a lot with sizing and weights of text and a general feel of how the app would work and behave if it was professionally created.


The rest of the app came a long quite quickly, I used a lot of my previous work from the zines such as the same imagery I have taken from the shows and the small articles I have written up. I was restricted inside digital publishing as I couldn’t have a fluid layout, meaning the app couldn’t scroll up or down. This was annoying as I wasn’t able to fit more onto each page of the app.
Photoshop (Motion)
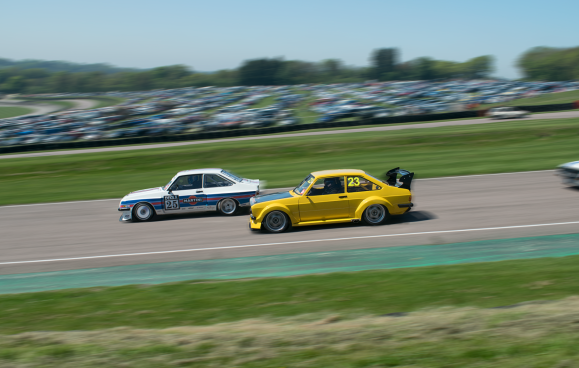
During BHP show there was a variety of different cars racing around the track. I have tried capturing cars in motion a few times after seeing photographers such as Frederic Schlosser and GF Williams do this successfully I wanted to try it for myself. Their photos are usually taken on a rig setup (usually a pole connected to the car and camera) and using a slow shutter speed and a slight movement in the car allows the background to be blurred whilst the camera shutter is open, and as the pole makes the camera stable on the car it creates a perfectly crisp car and blurred background.
As I am unable to do this when on the outside of a track I had to find a way around this. You can create a similar effect by trying to track a car with your camera whilst having a longer shutter speed, this is difficult to do and achieve a clear image of the subject.
I had to rely on my skills in post publishing to achieve the same effect as the professional photographers mentioned above. Photoshop has blur effects such motion blur and radial blur both what I will be using to create this effect.


Above you can see the steps I have taken to achieve the motion effect. Firstly was tracing the cars with the pen tool. After I had done this I made a new layer via copy so I had an additional layer with the cars on. I then selected the background layer below and used blur>motion blur to create the motion effect behind the cars, I also had control of the direction of travel. The second and third screen shot show the comparisons of the wheels, they didn’t quite fit in with the look of speed I created. I wouldn’t be able to use motion blur on the wheels as they don’t travel the same direction of speed. Radial blur uses a circular motion, which allowed me to make the wheels look like they are travelling at a greater speed.
Finished Image: